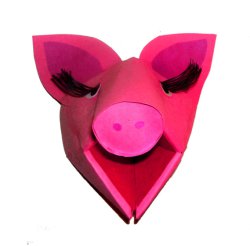
Instructions to make a 3D pig craft that you can hang on the wall or use as a puppet!
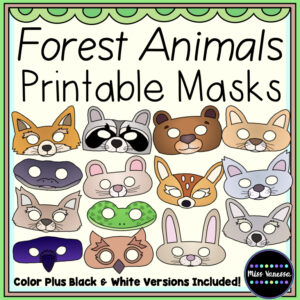
Make three and have a Three Little Pigs puppet show. Need a big bad wolf? Modify the black cat template.
Materials:
- construction paper
- a bottle of glue
- a stapler
- a wooden cylinder-shaped block
- a pencil
Directions:
Start by making a fortune teller out of construction paper. Click here for some directions on making a fortune teller (sometimes also called a “Cootie Catcher”).
Staple the top and bottom sections together to create a mouth that only opens in one direction.
To make the pig’s nose: Glue a piece of construction paper around a cylinder-shaped block. Hold the paper around the block until the glue dries.
Cut a triangle shape out of the end of the nose piece and attach it to the fortune teller with some glue. Hold the construction paper in place until the glue dries.
Your pig is going to look like an elephant at this point. Trim the nose to make it shorter like a pig’s nose would be.
Trace around the end of the wooden cylinder block to make a circle that is the same width as the opening on the nose. Add two small tabs to either side of the circle and cut this shape out. The tabs can be bent and dotted with glue and then carefully placed inside the nose to help it stick. Glue on two small black construction paper nostrils.
Cut out triangles from red construction paper and glue them on the inside of the mouth as shown in the picture. This part can be a little tricky as you need four triangles to fit nicely in each section of the mouth. When you make one that fits you can use it as a template and cut three more in the same shape. Glue these pieces inside the mouth.
Cut two triangles to make ears and add smaller triangles to those to complete the ears. Glue the ears onto the back of your pig’s head.
Cut out two pink squares and glue them to the back of the fortune teller to make cheeks. Trim off the excess paper with scissors.
Create eyes by cutting out two small circles of white construction paper. Cut two smaller black circles to make pupils. Make eyelids with half circles of construction paper. Glue the pupils onto the eyeballs and then glue the eyelids on.
Make the eyelashes by cutting out a small black rectangle and snipping very thin strips almost all the way down. Curl them by rolling them around a pencil. Cut them in half so you have two sets of eyelashes and then carefully glue them onto the eyelids.
Finally, push a small nail through one of the folds on the back of the fortune teller to create an anchor. Place a loop of string or floss on the nail and attach it to the wall with a tack.


Leave a Reply