This collaborative heart garland craft is perfect for friendship and community helper units and themes, and is also a fun craft for Valentine’s Day! This activity is a great opportunity for teachers to talk about community and working together towards a common goal.

Teaching Sharing & Working Together
Before this craft you can talk to students about sharing, working as a team, and being part of a community. Read a story about working together and practice sharing as a class.
While students are working on this craft, you can emphasize the values of sharing and collaboration by placing craft materials like markers, scissors, and other materials around the table for students to share while they are working. You can discuss sharing the materials beforehand. During the activity, students can practice using words like, “please”, “one more minute”, and “thank you” as they share materials.
Heart Garland Craft
Materials
-
- Scrap cardboard cut into 4″X6″ pieces
- Markers
- Construction paper
- Glitter paper or other decorative paper
- Any additional craft materials or scrap paper you want to use!
- Scissors
- Hole punch
- Glue bottle(s)
- Twine or yarn

Preparation
First, gather your craft supplies. You can repurpose some cardboard for this craft and use whatever craft supplies you have around. I already had glitter paper, construction paper, and sequins so that’s what I used.

Cut out multiple cardboard hearts ahead of time, preparing at least one for each student.
To hang them, I used twine, but yarn or even ribbon would work too.
For The Craft
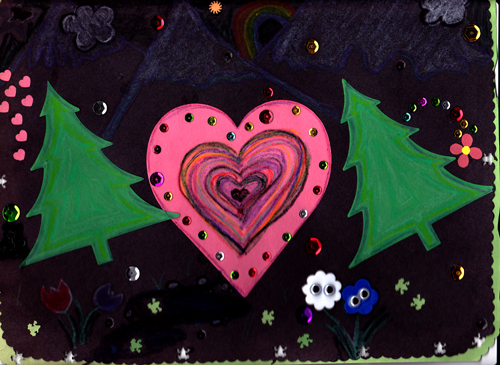
Students take a cardboard heart and dive straight into the decorating process, decorating one or both sides.

Use construction paper and other materials to create layers of texture and color. introducing, young learners to concepts like contrast and composition in art.
As you guide students through the crafting process, its always good to remind them that there’s no right or wrong way to make art. Encourage your students to express their individuality, reinforcing the idea that art is subjective and personal.

Sequins add sparkles and make the decorating process extra exciting!
Remind students to use small drops of glue to carefully place each sequin onto the heart. Working with sequins enhances fine motor skills as students manipulate small materials.

When students are finished decorating their heart, they can place it aside to let the glue dry for at least 10 minutes.
Once dry, hole punch the hearts at the top and string the twine though the hole, tie the ends to close the loop.
String the individual hearts all together on a longer piece of twine.

Finally, hang the garland using a few small nails or tacks!